


Spider Plant Propagation Made Easy: A Simple Step-by-Step Guide
The Spider Plant, or Chlorophytum comosum, is a popular houseplant that can add a lively vibe to any room. It’s not only easy to care but you can also multiply it using several proven propagation techniques. So, if you want to know how to propagate a spider plant, you’ve come to the right place.
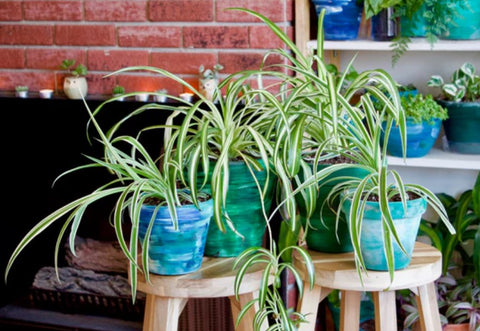
Spider plants can grow lots of little Spiderettes that transform into new baby plants by rooting them in soil or water. You can also divide a large plant to grow new plants that you can give away as gifts or simply expand your indoor garden. This amazing low-maintenance plant’s foliage will create a rhythmic visual for any interior space, with its slender leaves cascading sprightly.
So, without further ado, let’s delve into all the ins and outs of spider plant propagation.
Spider Plant Propagation: 3 Easy Techniques
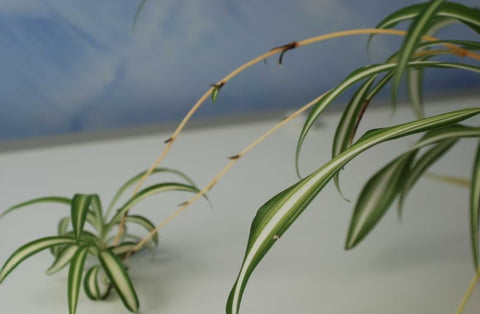
There are many ways of propagating a spider plant. You can use the division method and separate a larger parent plant into individual sections. Or you can root all the baby spider plants, attached to long runners (stolons), which your plant should start producing once it’s at least 1 year old. These are known as plantlets or spiderettes.
So, here are the most successful ways of propagating a spider plant:
- Cutting and rooting spiderettes in water;
- Planting the spiderettes in pots of soil while they’re still attached to the stolon or cutting them, first, and then rooting them in soil;
- Dividing the parent plant into small sections and growing them in individual containers with soil.
When to Propagate a Spider Plant
The best time to propagate a spider plant is spring or summer when the plant is actively growing. This tropical plant is a fast grower and in ideal conditions, it will readily produce baby plants after one year. Note that underwatered spider plants may struggle to grow spiderettes.
In addition, a good opportunity to propagate your spider plant is during pruning sessions. As trimming it to control the plant’s size and manage its shape will naturally involve cutting the leggy runners with the plantlets, attached to its ends.
When it comes to propagating a larger mature spider plant by dividing it, you can do so at almost any time of the year without much effort.
Propagating a Spider Plant: Tools and Supplies
You need some common tools and materials to propagate a spider plant, such as:
- Knife, snippers, or shears
- 4” pot with good drainage (one for each spiderette or section)
- Well-draining potting soil
- Clear glass jar with distilled water (for spider plant water propagation)
Sanitize your tools with rubbing alcohol to prevent the spread of pests or diseases to new plants.
How to Propagate a Spider Plant
Why propagate a spider plant? These plants practically scream to be propagated, sending the message through their playfully dangling spiderettes. The plant’s lush and bushy stature and easy-to-separate structure will also prompt you to divide it and multiply your spider plant collection this way.
How to Propagate a Spider Plant in Water
How do you propagate a spider plant in water? Easily! You’ll witness the magical formation of the roots on the delicate, cute plantlets in no time. The roots take only about 7-10 days to start showing. Remember not to use tap water, as spider plants are particularly sensitive to fluoride. Below are the steps for propagating a spider plant in water:
- Take a shallow glass container or jar and fill it with distilled water.
- Cut a healthy offshoot or spiderette from the parent plant. Trim off the lower leaves that might sit in the water and rot.
- Place the spiderette carefully in the water-filled container.
- Keep the container with the plantlet in a spot with bright but indirect sunlight. Change the water occasionally.
- Wait for the roots to grow at least 2”-3” before transplanting the baby plant into a pot with soil.
Note that although spider water propagation is the fastest way to root the cuttings, they sometimes fail to establish and flourish once planted in soil. Hence, the below-described soil propagation method is slightly more successful.
Tip: If you’re keen to watch how the roots form on the baby spider plants, you can use a wet paper towel placed in a shallow dish and root the spiderettes in this way. This is an alternative to the water propagation technique, which is effective and fast, as long as you remember to keep the rooting medium moist at all times.
Spider Plant Propagation in Soil
The advantage of propagating spider plants in soil is that the roots grow stronger with this method. You can use a spiderette cutting for this. It's important to note that ideally, you should choose plantlets with little nodes already showing at their base. These will grow more easily into roots.
Or you may also grow a spiderette into a new spider plant while it’s still connected to the parent plant. You’ll separate the rooted spiderettes from each runner once established and strong.
Cutting off the Spiderette From the Mother Plant
Separating the spiderettes from the parent plant and growing them in the soil is easy. And the result is new plants with healthy roots.
- Take a pot with draining holes and fill it with a well-draining potting mix.
- Cut a healthy spiderette from the main plant.
- Place this baby plant, with the cut side down, in the pot by making a hole in the soil. Cover the base lightly so that the plant remains erect.
- Water the soil and place the pot in a spot with bright but indirect sunlight. The roots will take a few weeks to grow.
Soil Propagation With Spiderettes Still on the Stolon
You can plant a spiderette still attached to the main plant, allowing it to get more nutrients and moisture. The steps are similar to planting a cutting in soil, except for a few tweaks, as described below:
- Prep the pot by filling it with a potting mix, which should be slightly moist.
- Make a small hole in the soil and place a spiderette while it’s still connected to the parent plant via the runner. Cover the base with soil to keep it erect.
- Water the soil thoroughly and ensure the baby spider plant gets bright but indirect light.
- Wait for the offshoot to grow by getting nutrients and water from the parent. Then, detach it from the parent plant by snipping the stolon.
Spider Plant Propagation by Division
Spider plants can also be propagated by dividing the parent plant into sections. This is an excellent way to multiply your collection when the main plant is too large for its pot instead of simply repotting it into a larger container.
It’s a simple process that rejuvenates the main plant and allows it to thrive. Here are the steps to propagate a spider plant by division:
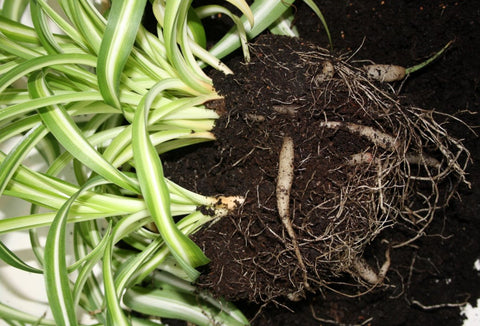
- Remove the parent plant from its pot without disturbing the root ball.
- Using a pruner or your hands, gently separate the root mass to get multiple sections. Each should have healthy roots and leaves.
- Take one pot for each division and fill it with potting soil.
- Plant each section into the pots with soil and water them.
- Place them where they can get bright, indirect sunlight.
How to Care for Your Baby Spider Plants After Propagation
Now that you have successfully propagated your Chlorophytum comosum, it’s time to provide them with the right growing conditions. Remember that every new baby plant needs extra nurturing and love.
Here’s what you should do to care for your spider plants to keep some common problems at bay:
- Find the right spot: Make sure the baby plant receives sufficient light. But keep it away from direct scorching sunlight.
- Water regularly: Keep the soil moist but not soggy. The best method is to allow the top half of the soil to dry out before you water your spider plant again.
- Use chemical-free water: Tap water often contains harsh chemicals. So, you can give the plant filtered, distilled water or rainwater.
- Provide humidity: Spider plants love some moisture in the air. So, mist the baby plant to boost the humidity level, especially if it’s in a dry spot.
- Fertilize: During the growing seasons, spring and summer, fertilize the plant once a month using a diluted liquid fertilizer.
- Control pests and diseases: The foliage and roots of a new plant are more susceptible to issues. So, monitor them closely to prevent serious pest and disease problems.
- Pay attention to leaf discoloration: Yellow and brown leaves on your spider plants are signs of over or underwatering; plant toxicity, due to overfertilization; low humidity; exposure to direct sunlight; or chemicals in the water.
How to Propagate a Spider Plant: FAQs
Q: Is it better to propagate spider plants in water or soil?
A: It is better to propagate a spider plant in soil as the roots grow stronger. While growing in the soil, the roots experience more resistance, making them sturdier, which results in a healthier plant. However, water propagation can lead to slightly faster rooting.
Q: Why is my spider plant not producing baby Spiderettes?
A: If your spider plant is not producing baby spiderettes, pay attention to its water needs. The problem could be underwatering. Excess or deficient light exposure could also be the cause. Another reason is that the plant might be rootbound because it’s too large for its current pot.
Q: Should I cut the babies off my spider plant?
A: For propagation purposes, you can cut or leave the babies on the spider plant and root them while still connected to the stolons. If you don’t intend to multiply the plant, you should cut the spiderettes during pruning sessions. This will help you prevent wasting the plant’s energy and manage a potentially leggy or unruly appearance of your mature spider plant.
Q: How long do spider plant cuttings take to root?
A: If you propagate spider plant cuttings in water, they may take 7-10 days to start developing new roots. In soil, rooting may take a few more days. But you should remember that baby plants rooted in water have weaker roots.
Q: Why do my baby spider plants keep dying?
A: Baby spider plants may die for several reasons, starting with overwatering or underwatering. It could also be due to exposure to excess or deficient sunlight. Overfertilization or nutrient deficiency can also be the culprit behind the issue. Other problems include poor humidity levels, pest infestation, root rot, damage caused during propagation, etc.
Q: How long can you leave spider plant babies attached?
A: You can leave spider plant babies on the parent for some time if there are just a few of them. Ensure to water and feed the mother plant sufficiently. But if the number increases rapidly, it’s best to trim them off when the offshoots start developing nodes and leaves. This will keep the parent plant healthy and let you grow strong new plants.
Conclusion
Learning how to propagate your spider plants and grow new plants is a rewarding and satisfying process. It can be a joyful experience to see the baby plantlets grow strong. You can then create a beautiful display of hanging plants with cascading foliage by repotting them in hanging planters.
Pair your new spider plants with companions like the Peacock plant or a range of snake plants. You can also win hearts by giving baby spider plants as homegrown gifts to friends and family!


I just got a spider plant because they pretty and I hope my plant will produce many babies!
I just
Leave a comment